Sign In to the Moderator Dashboard
Navigate to swansea-vote.vercel.app/moderator in your browser. You will be presented with the sign-in screen below.
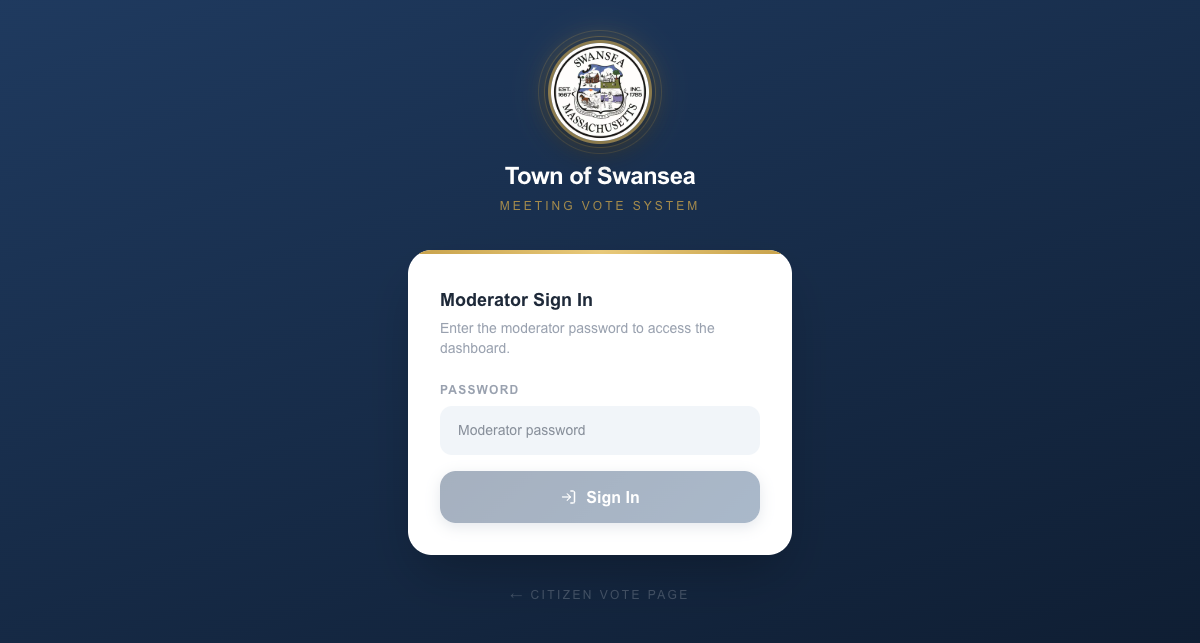
Enter the moderator password and click Sign In. Once authenticated, you will be taken to the dashboard automatically.
The Moderator Dashboard
After signing in you land on the dashboard. All past and upcoming meetings are listed on the left. The New Meeting form is on the right.
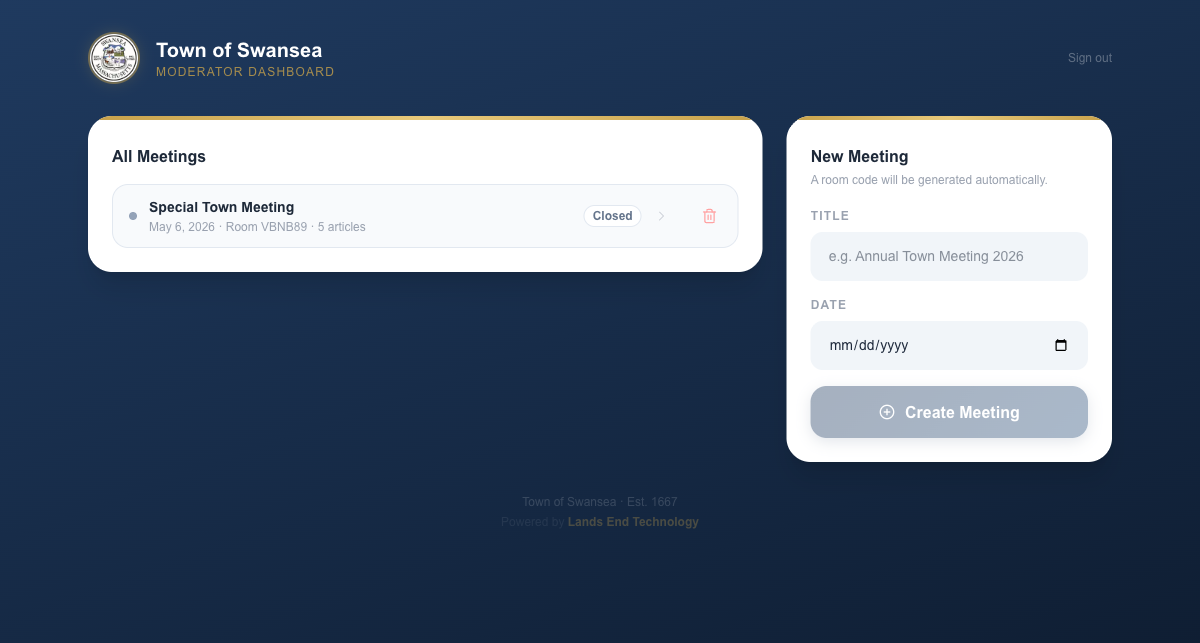
Each meeting in the list shows its title, date, room code, and current status (Active or Closed). Click any meeting to open its control panel.
Create a New Meeting
In the New Meeting section, enter the meeting title and date, then click Create Meeting. A unique room code is generated automatically — you do not need to choose one.

The Control Panel
After creating a meeting you are taken straight to its control panel. The room code appears in gold in the top-right corner. The attendee count updates live as voters join.
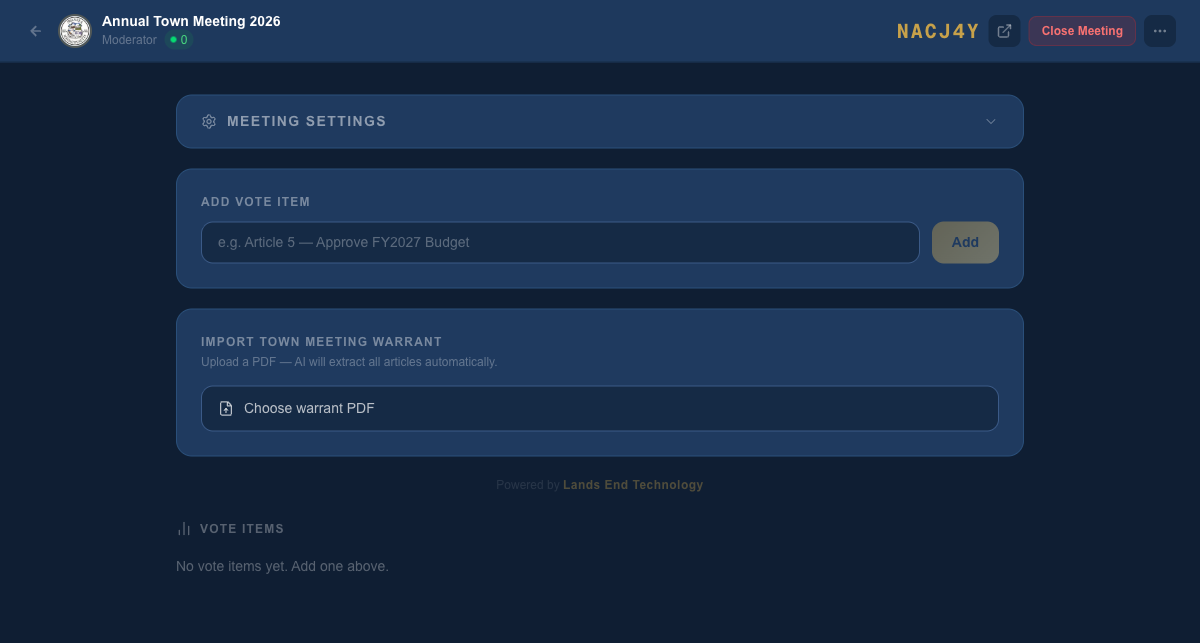
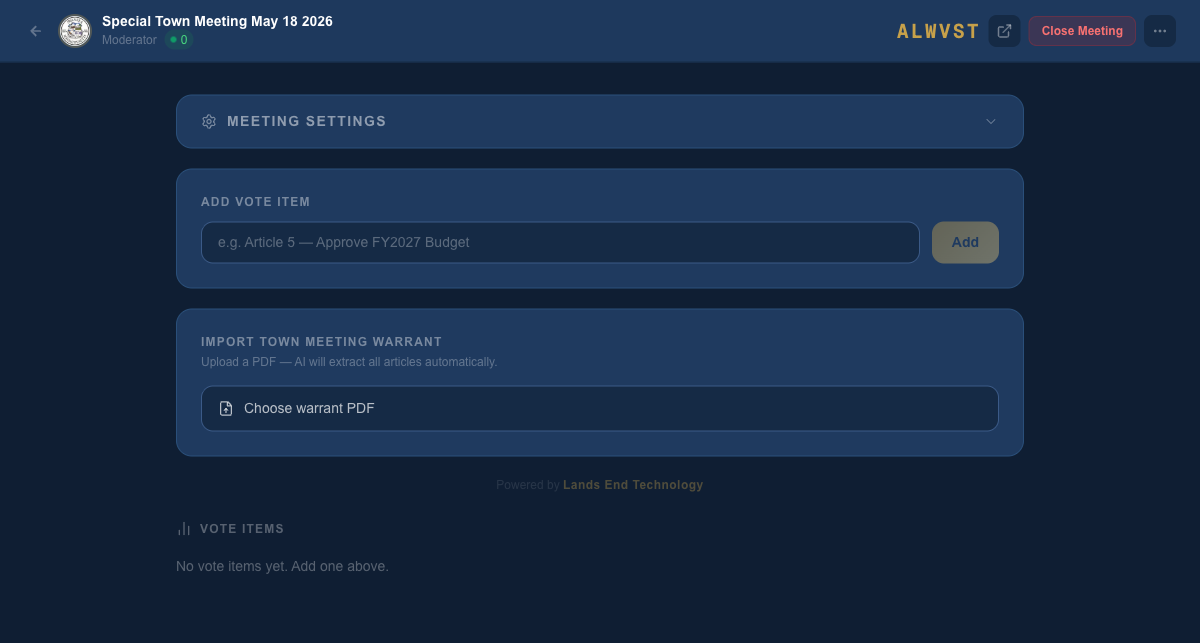
Use Add Vote Item to enter articles one at a time, or use the Import Town Meeting Warrant section below it to upload the warrant PDF and have AI extract all articles automatically — see Step 4b.
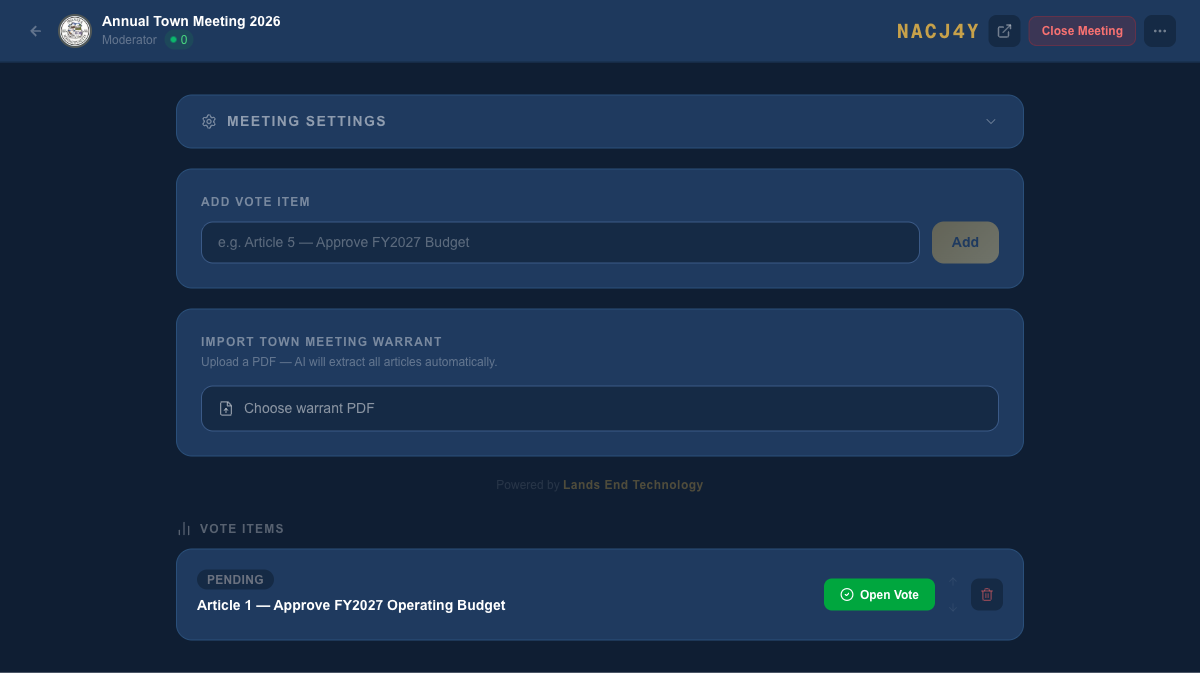
Each article starts in Pending status. You control exactly when voting opens and closes — nothing happens automatically.
Import the Town Warrant with AI
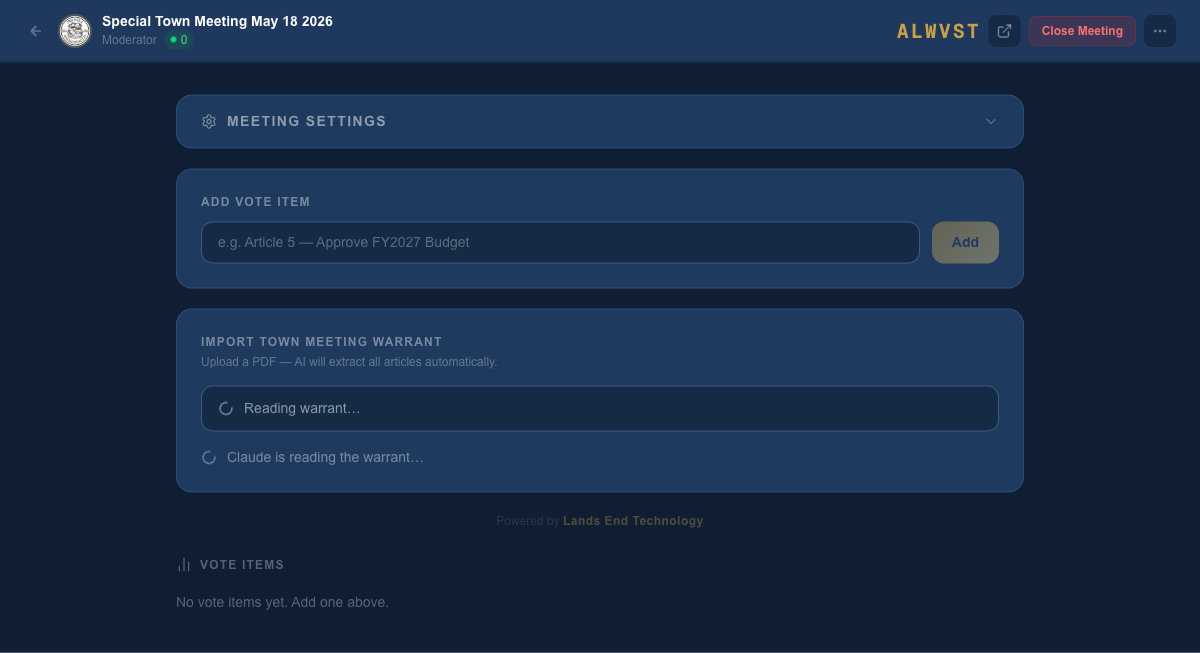
Instead of adding articles one by one, you can upload the official warrant PDF and let the AI extract every article automatically. Click the Choose warrant PDF upload area and select the warrant file from your computer.
Once selected, the file uploads and the AI begins reading the warrant. You will see a processing indicator while it works — this typically takes 20–40 seconds depending on the length of the warrant.
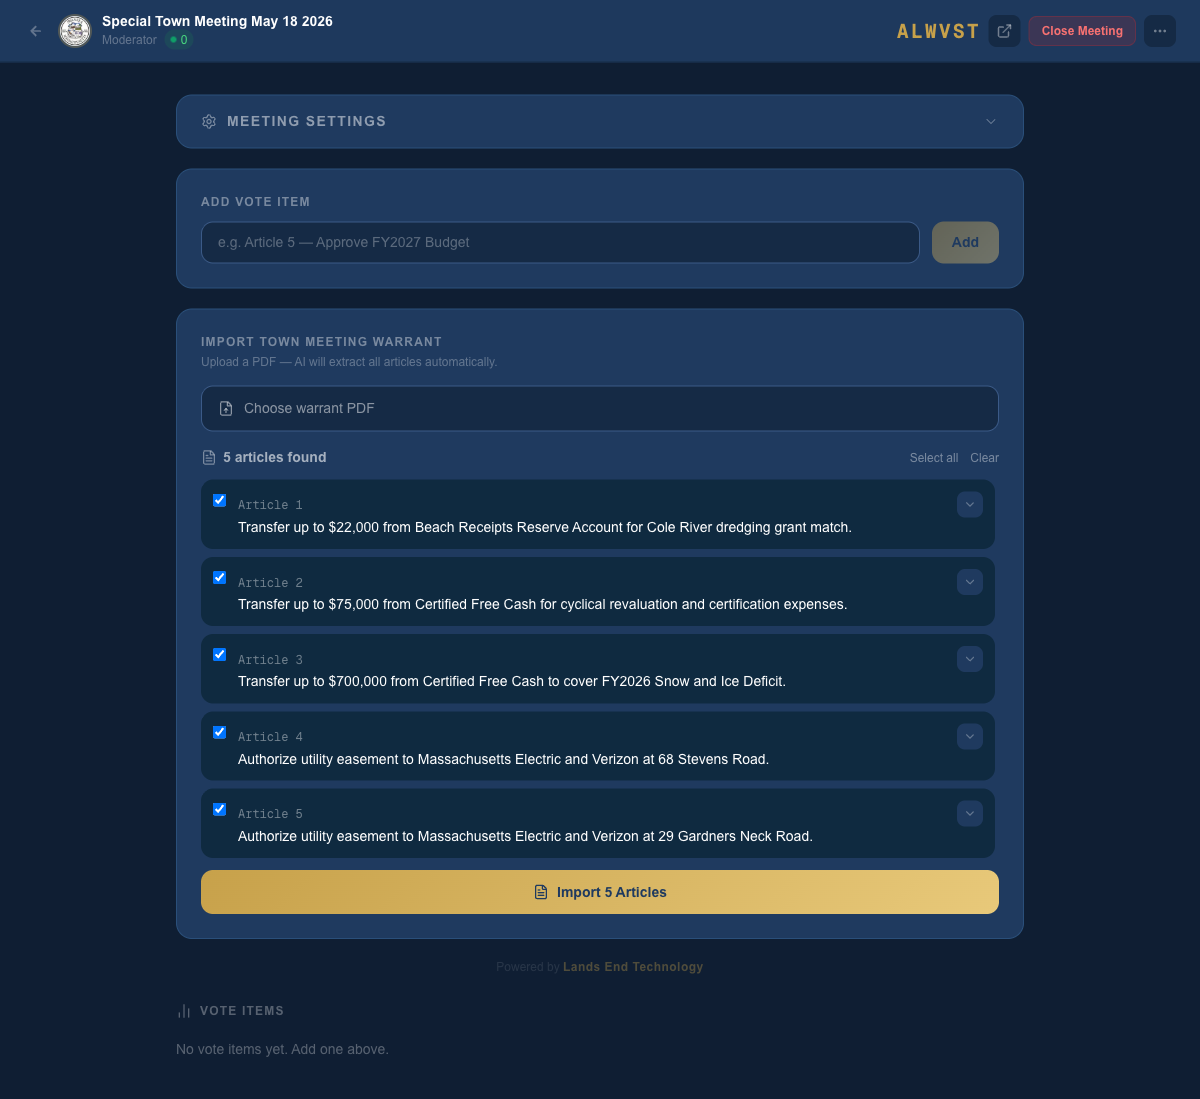
When complete, all articles are added to the Vote Items list automatically, formatted with article numbers and full question text pulled directly from the warrant.
Open Meeting Settings
Click Meeting Settings (the gear section at the top of the control panel) to expand the settings panel. This is where you configure voter passes and geofencing.

Generate Voter Passes
In the Voter Passes section, enter the number of passes you need and click Generate Passes. Generate at least as many passes as registered voters expected to attend — extras can be left unused.
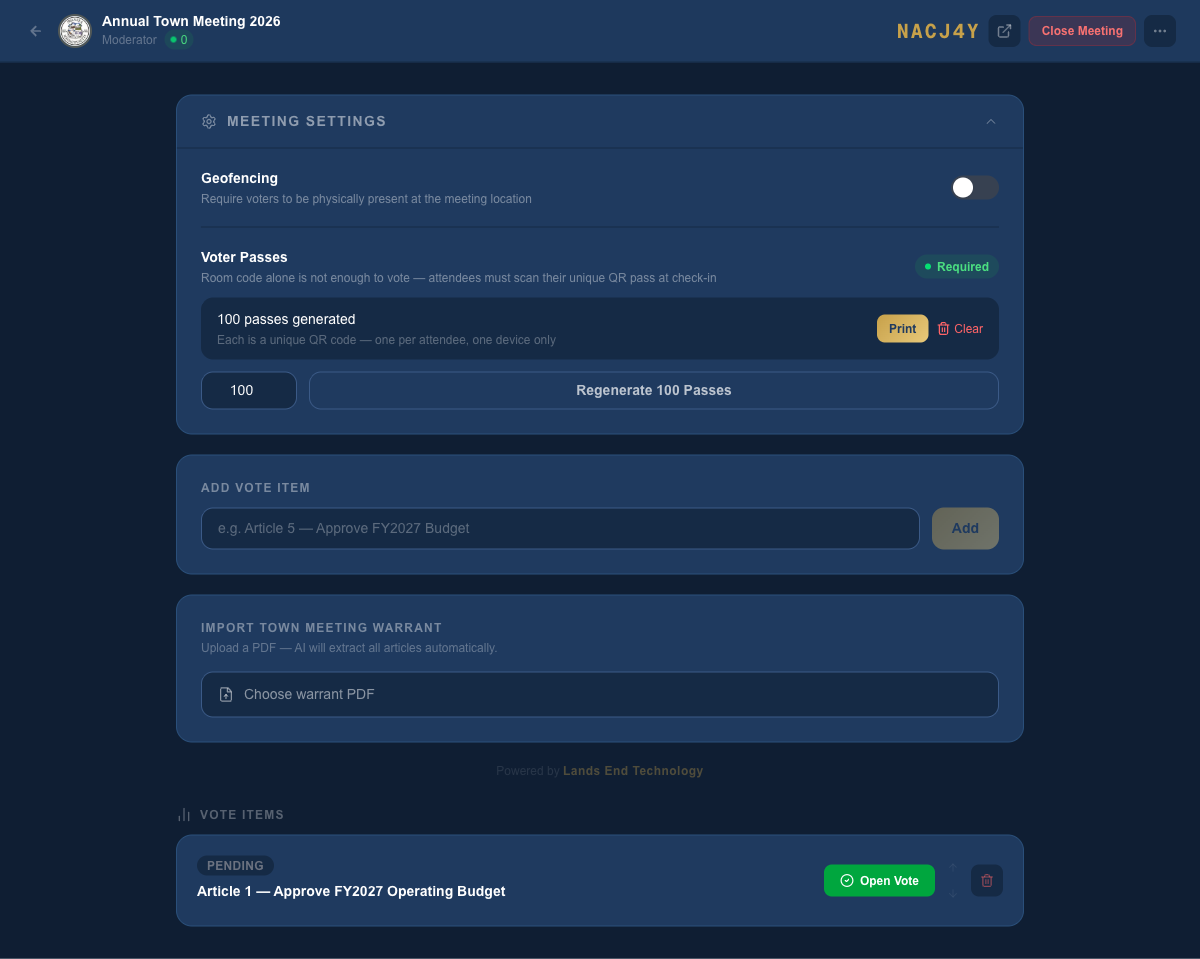
Once passes are generated, voter token enforcement is active. This means:
- The room code alone is not enough to vote
- Every attendee must scan their own unique QR pass to join
- Each pass can only be claimed on one device — it cannot be shared
Print the Voter Passes
Click the Print button next to the pass count. This opens the print page showing all generated passes — one QR code per pass, formatted for cutting and distribution.
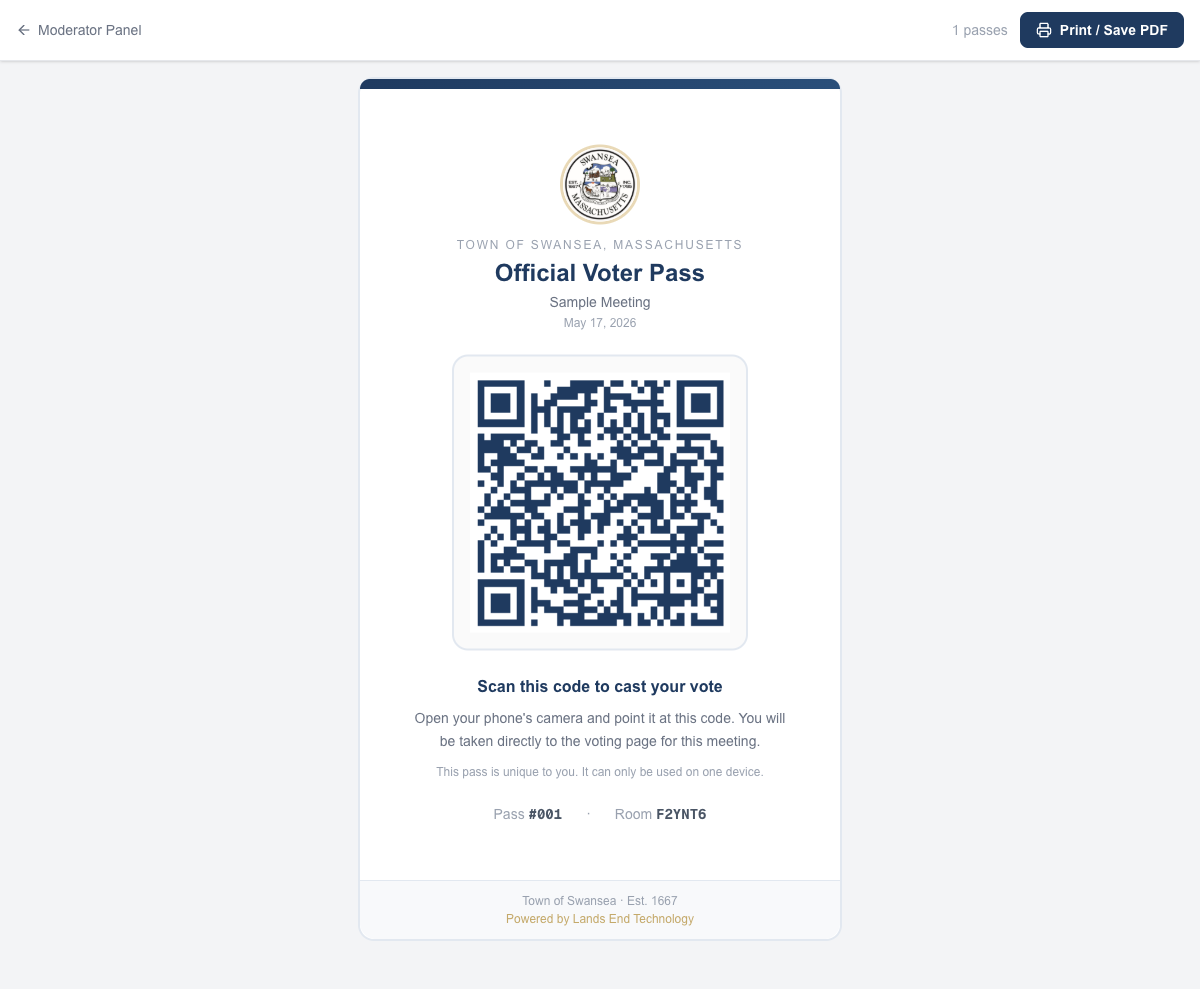
At check-in, verify each attendee against the registered voter roll, then hand them one printed pass. They scan it with their phone camera to join the meeting and vote.
Open a Vote
When you are ready to call a vote on an article, click Open Vote next to that article. The vote goes live instantly — all attendees who have joined will see the YES / NO / ABSTAIN buttons appear on their phones.
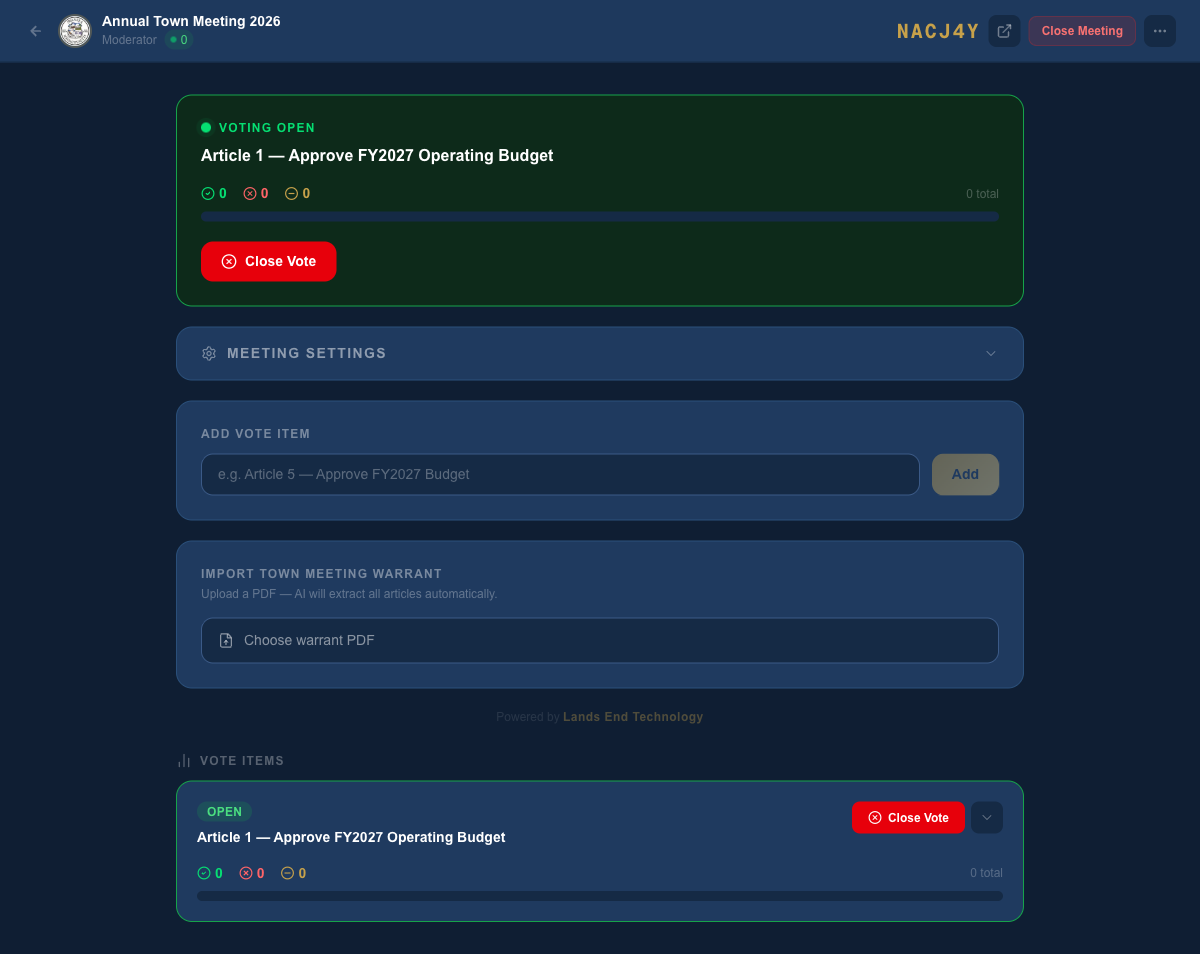
The live tally updates in real time on the control panel as votes come in. You can see YES, NO, and ABSTAIN counts and the total number of votes cast.
Close a Vote & View Results
When you are satisfied voting is complete, click Close Vote. The article moves to Closed status and the final tally is locked.
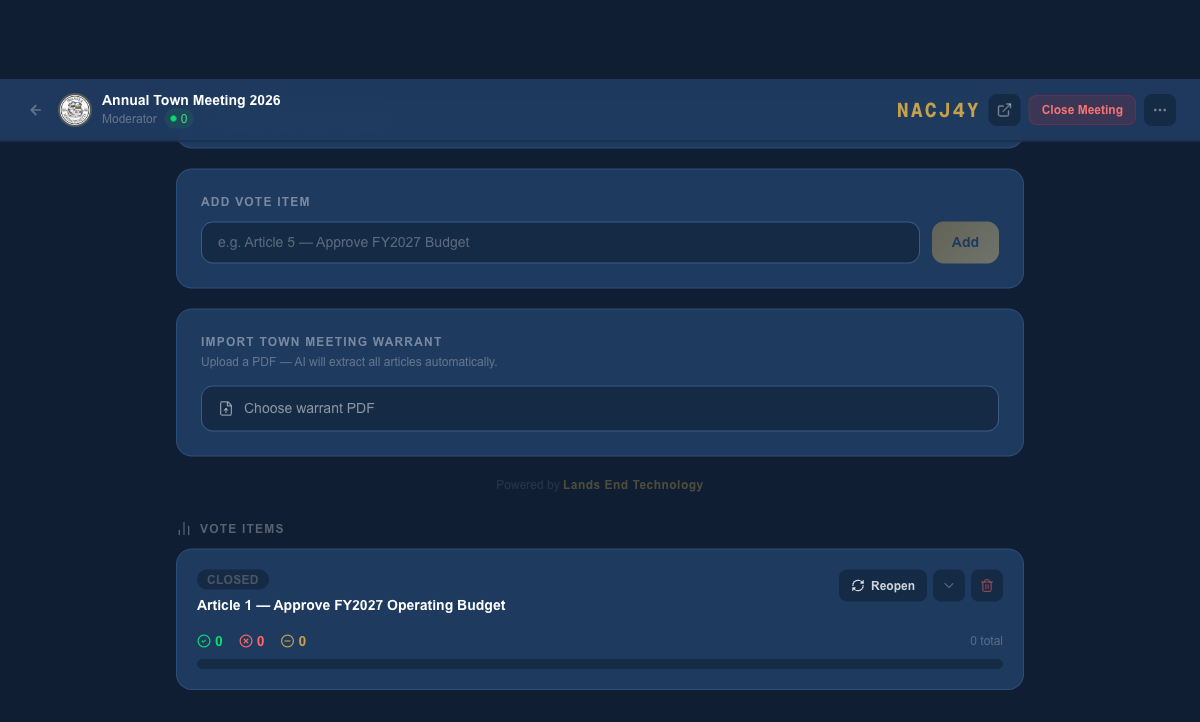
The outcome — Passed, Failed, or Tie — is calculated automatically based on YES vs NO (abstentions do not count toward the outcome).
- A closed vote can be reopened if needed using the Reopen button
- After the meeting, use the Export CSV option from the More menu for the official record
- The Display page (accessible from the More menu) can be projected on screen so the room sees live results
Meeting Results & Official Report
After closing the meeting, two views give you a full picture of the results — a live Results page with colorful charts and a printable Official Report with the complete tally for the record.
Live Results Dashboard
Access the Results page from the moderator panel's More menu, or share the direct link with attendees after the meeting. Every article is shown side-by-side with a bar chart and pie chart breakdown.
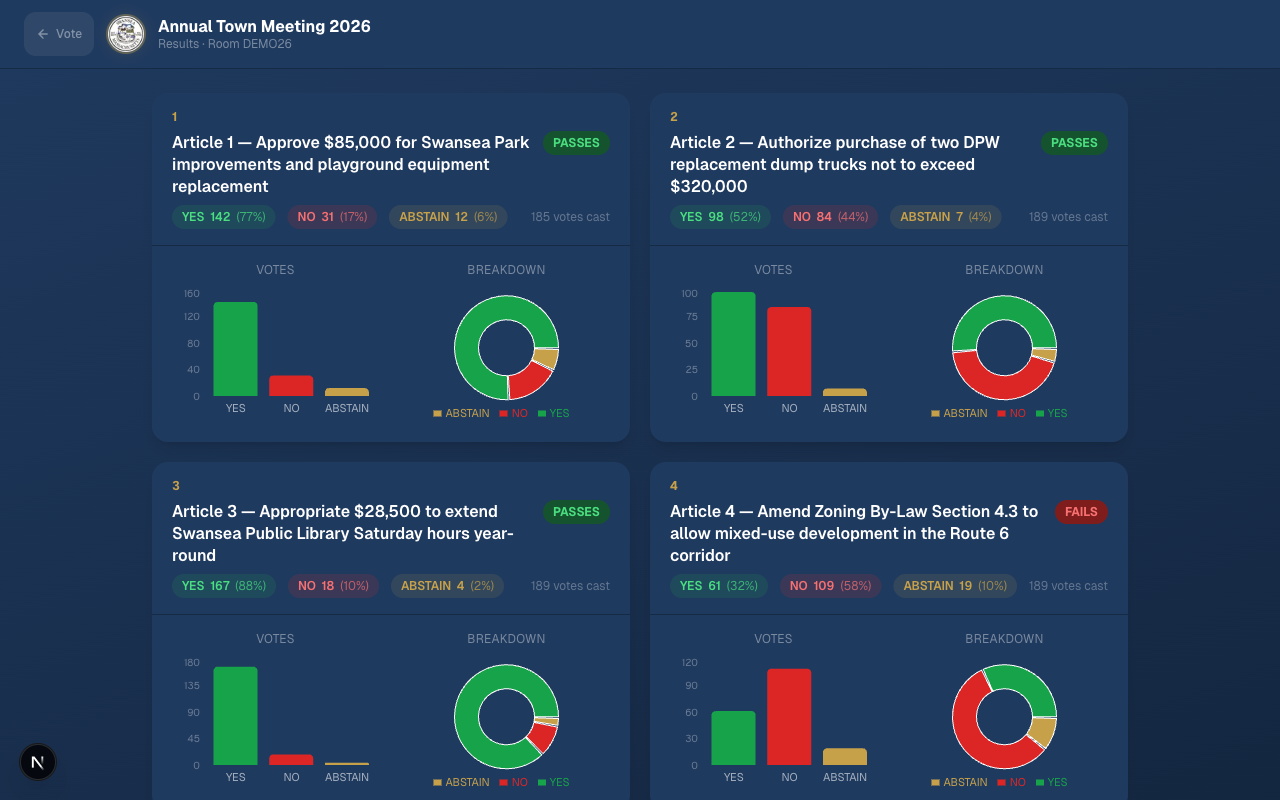
The Results page displays each article's YES / NO / ABSTAIN tally with color-coded bar charts and pie charts. Green = YES, Red = NO, Amber = Abstain. Passed articles show a green PASSES badge; failed articles show a red FAILS badge.
Official Meeting Report
The Official Report is a clean, printable document designed for town records. It includes the meeting summary, total voter participation count, and a detailed breakdown of every article with percentage bars. Use Print / Save PDF to create the official record.
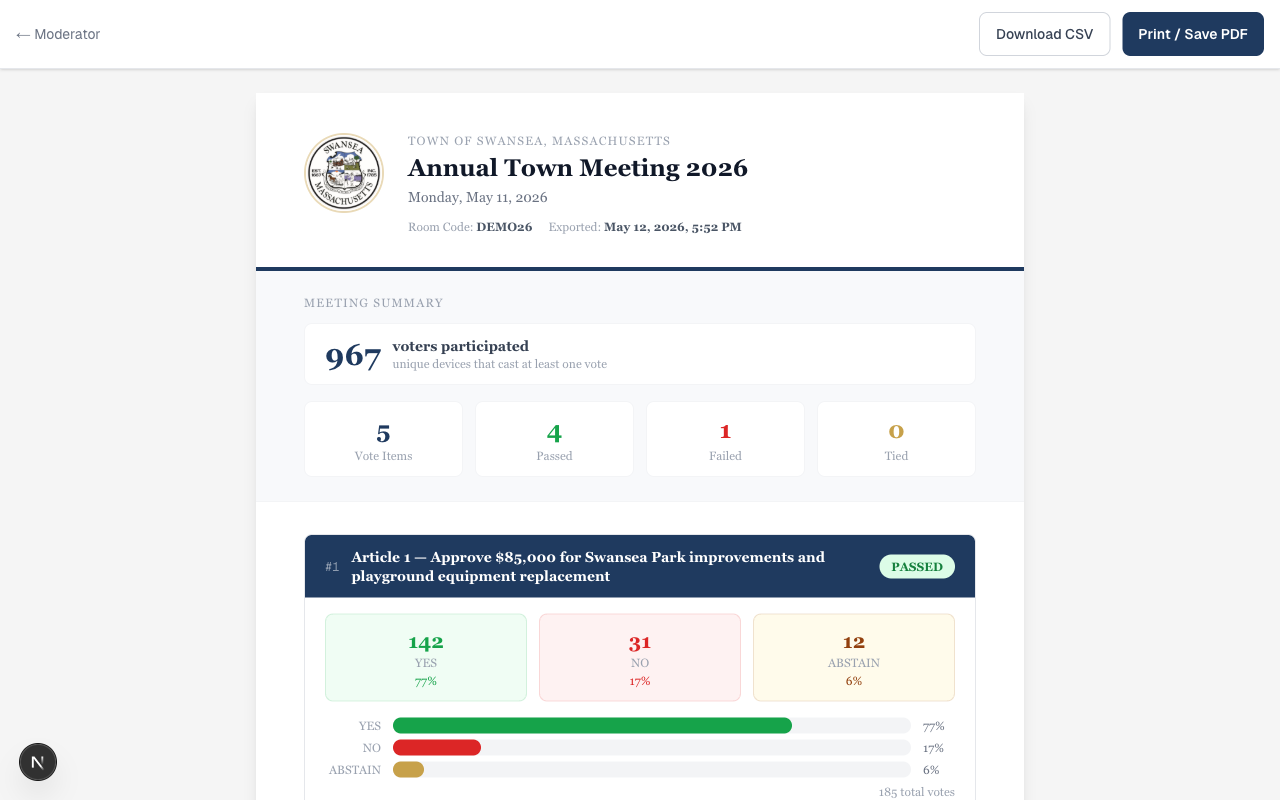
The Official Report shows total participation (unique devices that cast at least one vote), a summary of how many articles passed, failed, or tied, and a detailed per-article tally with progress bars for each choice.
- The Download CSV button exports the full vote record for use in spreadsheets or archival
- The participation count reflects unique devices — a voter who voted on three articles counts as one participant
- The Results page can be projected on a screen in the hall so the room sees the outcome in real time
- All data is stored in the Town's own database and remains accessible after the meeting closes